Turn Your Wedding Photos Into a Stunning Visual Story
A wedding album is more than a Visit webpage collection of photos — it’s a carefully crafted narrative of one of the most important days of your life. While digital galleries are convenient, nothing compares to flipping through a thoughtfully designed album filled with laughter, love, and unforgettable memories.
But a great album isn’t just about which photos you include — it’s also about how you present them. The layout, design, and flow of each page contribute to the emotional impact of your story.
If you’re wondering how to elevate your wedding album beyond the standard layout, here are some creative wedding album layout ideas that will help transform your images into a timeless work of art.
- Start with a Strong Visual Narrative
Before getting into specific design elements, think about the story arc of your wedding day. A good wedding album flows like a movie — with a beginning, middle, and end.
Here’s a simple structure to guide your layout:
Opening Pages: Details, invitation suite, and getting-ready moments
Ceremony Build-Up: Venue shots, décor, guests arriving
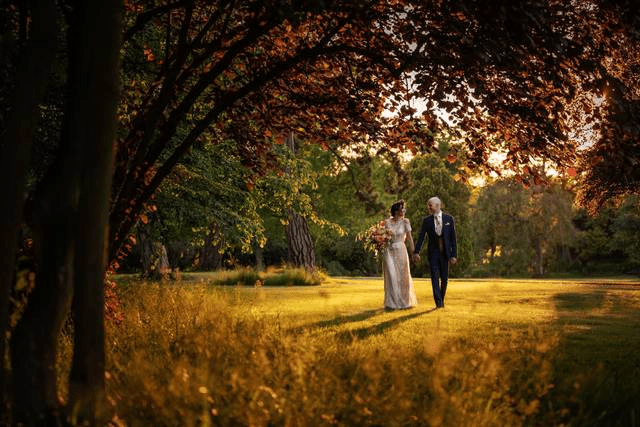
The Ceremony: Vows, first kiss, walking down the aisle
Post-Ceremony: Couple portraits, family shots, candid hugs
Reception: Speeches, first dance, cake cutting, dancing
Closing Moments: Nighttime portraits, sparkler exit, final kiss
Telling the story in order helps the viewer feel like they’re reliving the day from start to finish.
- Mix Full-Page Spreads with Collages
Using full-page (or full-spread) images is a powerful way to highlight your most emotional or visually stunning moments. Think:
The kiss
A dramatic couple portrait
A sweeping wide shot of the venue
Balance these with collage-style layouts — grids or creatively overlapping images — to capture quick moments like laughter, toasts, or dance floor action.
Tip: Use full spreads sparingly to avoid overwhelming the viewer and to create dramatic visual breaks.
- Create Themed Pages for Detail Shots
Details deserve their own spotlight. Dedicate a page or two to the small things that made your day unique:
Bouquet and floral arrangements
Rings and invitation flat lays
Shoes, dress textures, and groom accessories
Décor elements, table settings, and signage
Lay these out in a clean grid or a scrapbook-style collage for a boutique feel. Keep spacing uniform and let the textures and colors do the talking.
- Add White Space for Elegance
Sometimes less is more. Don’t feel the need to fill every inch of the page. Using negative space or white backgrounds can make the layout feel clean, modern, and luxurious.
Try placing a single photo with a lot of margin around it, especially for portraits or emotional shots. This draws focus and makes the image feel iconic.
- Use Double Spreads for Signature Moments
Some moments deserve to breathe — literally across two pages.
Examples:
The moment you’re walking down the aisle
Your first look
A wide-angle sunset portrait
The kiss surrounded by cheering guests
When doing this, choose high-resolution images and make sure the main subject isn’t lost in the center fold.
- Incorporate Quotes or Captions
Words can add emotional weight. Consider adding:
Your vows
Favorite song lyrics
Quotes about love and marriage
Dates, times, or location markers
Keep typography elegant and minimal. Place captions subtly beneath images or dedicate a page to a quote for dramatic effect.
- Create Movement with Photo Sequences
Tell a short story across three or four photos on the same page:
The moment before the kiss, the kiss, and the reaction
First dance spins
Walking hand-in-hand, looking at each other, then laughing
Sequence layouts build emotional momentum and add rhythm to the album. Keep the photos in similar lighting or tones for consistency.
- Balance Color and Black & White
Black and white photography adds drama and timelessness. Use it selectively to enhance emotional moments or create contrast with color pages.
Ideas:
A black-and-white first look next to a colorful reception shot
Monochrome for portraits and prep, then color for celebration
Too much mixing on a single spread can be jarring — aim for themed sections or subtle transitions.
- Add a Timeline or Infographic Page
A fun and modern twist is to add a visual timeline of the day:
9:00 AM – Getting Ready
1:00 PM – First Look
3:00 PM – Ceremony
6:00 PM – Reception
This adds structure and can serve as a great introduction or closing page.
- Include a “Behind-the-Scenes” or Blooper Page
Not every moment is posed and perfect — and that’s what makes them special.
Add a spread filled with:
Funny faces
Outtakes
Candid hugs or silly dances
Kids being themselves
This humanizes the album and captures the realness of the day.
Bonus: Make It Personal
Every couple is unique — your album should reflect that. Consider customizing your layout with:
A custom monogram or wedding logo
Personalized cover design
Favorite quotes throughout the pages
Maps or illustrations (like the wedding venue)
These small touches turn your album into a personal keepsake, not just a photo book.
Final Thoughts
A wedding album is more than just pictures on a page — it’s your love story, immortalized. The layout you choose impacts how you’ll remember your day and how others will experience it with you.
From full-spread emotional highlights to creative collages and personal touches, there are endless ways to craft a beautiful, customized wedding album. Take your time, work closely with your photographer or album designer, and focus on what truly matters: preserving your story in a way that feels true to you.
